BeatmaniaIIDX arcade control deck armrest fix and replace leather
Documenting how I fixed the broken armrest of the control deck on my Beatmania IIDX cabinet as well as replacing the worn and damaged leather covering it.
This seems to be one of those things that many IIDX cabinets experience in their life cycle. Due to abuse, e.g. sitting on it, the armrest of the control deck breaks lose. The leather of the armrest becomes sticky due to age or has holes either due to abuse or just by accident.
With a few hours to spare and some tools, these can be fixed fairly easy though.
Excuse my terrible Photoshop Gimp skills. I redacted parts of the pictures below for privacy
reasons.
Tools
I used the following tools
- Hex screwdrivers/keys in different sizes to remove the control deck screws
- Philips screwdriver: I needed that because the previous owner already “fixed” the armrest but it wasn’t well done at all
- Wood clamps to fixate the glued back wood slat
- Box cutter to cut and remove excess material
Also recommending a large and clean table. You do not want to do this on the floor… your back will thank you.
Materials
- Wood glue
- Wood slat for clamping down to not damage the wood of the control deck
- Additional wood slats + screws: Optional, but creating a more supportive structure for holding the armrest
- Leather Patch Kit, Self-Adhesive or similar
- Width at least 130 cm, length 40 cm
- Isopropyl
- Old but clean piece of cloth for wiping away glue remains
Taking apart the deck
Exploded drawing of the control deck from a cabinet manual for reference:
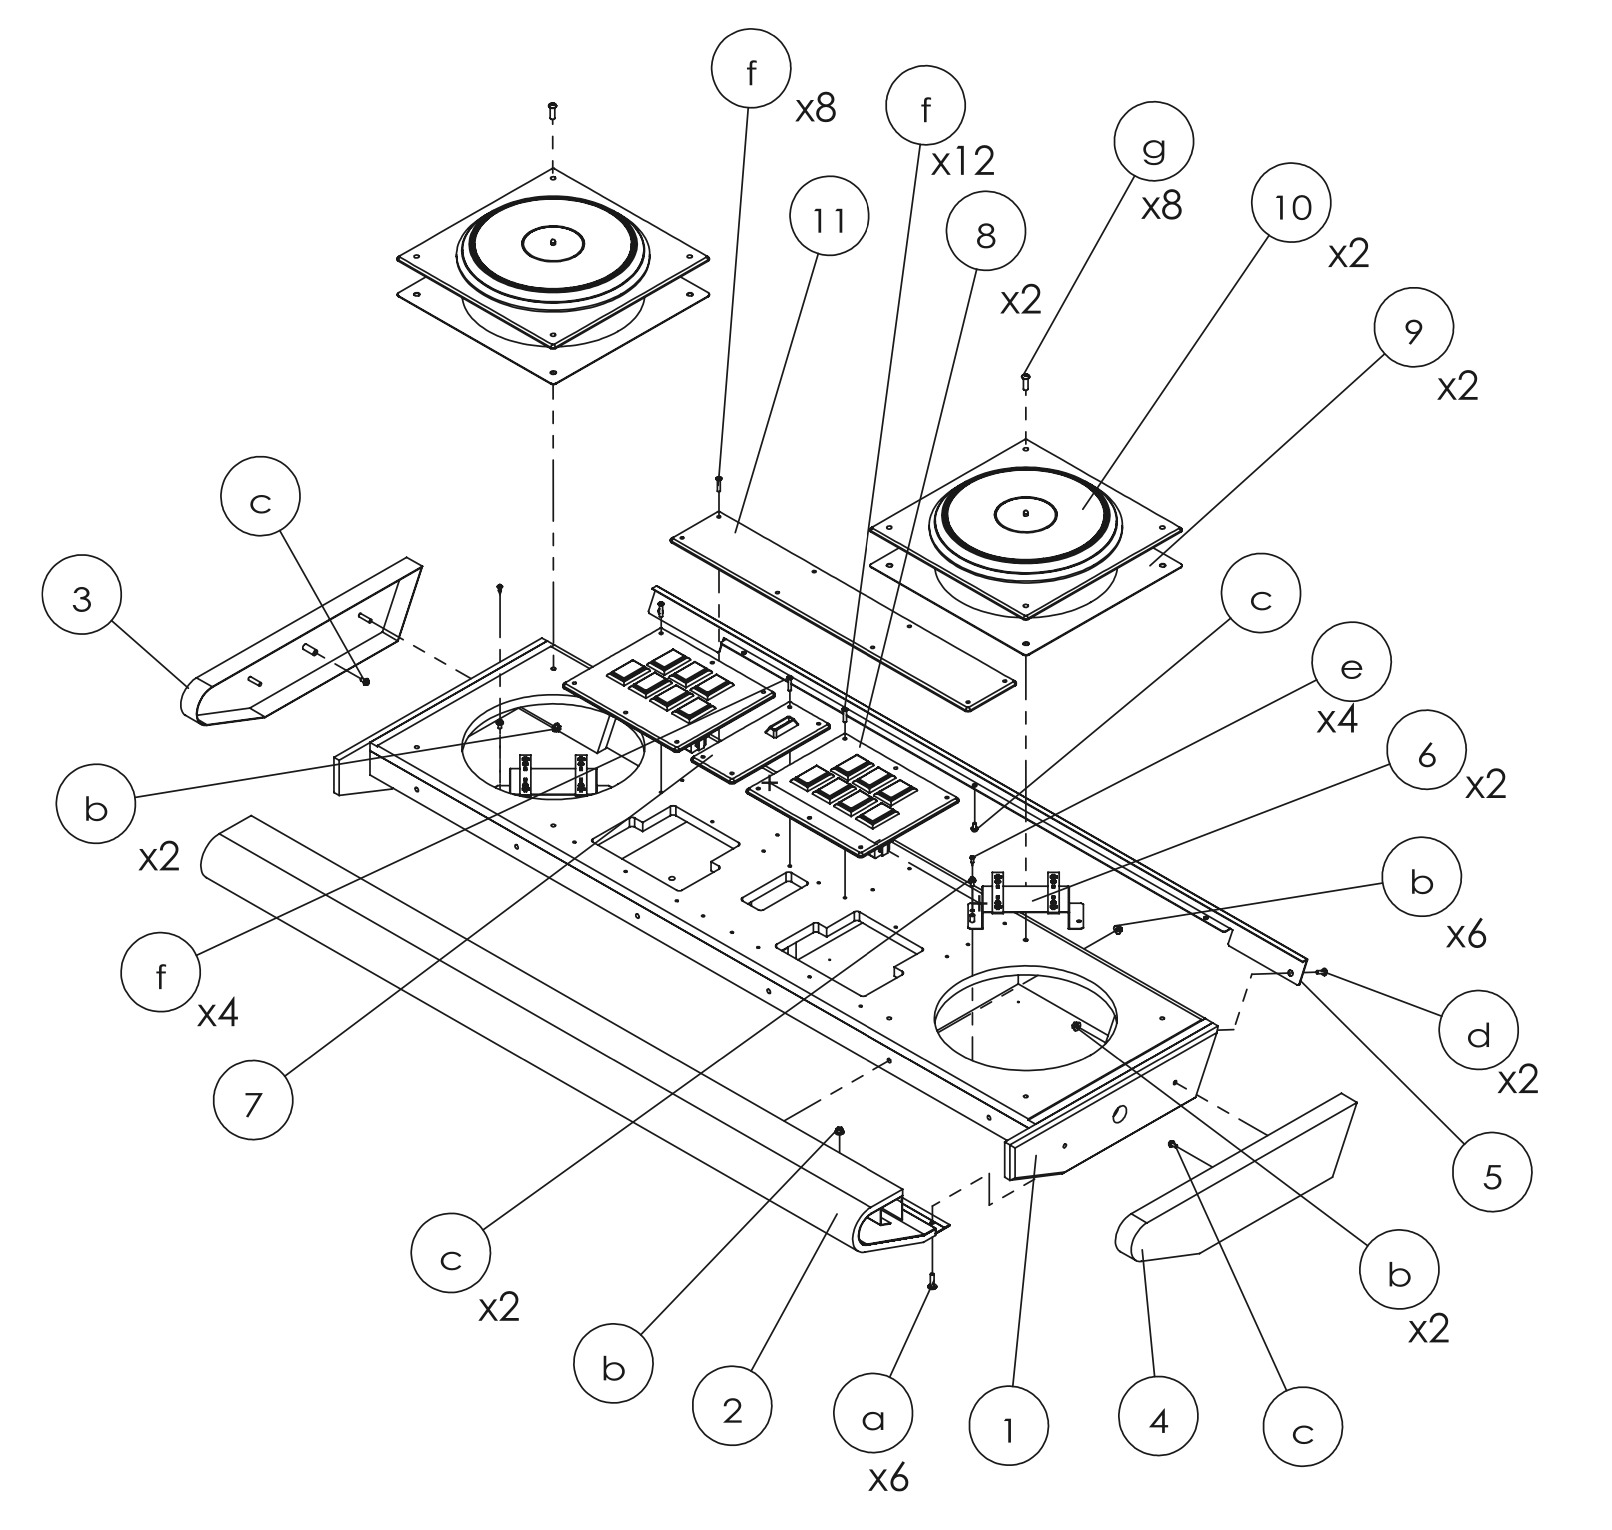
Remove in order:
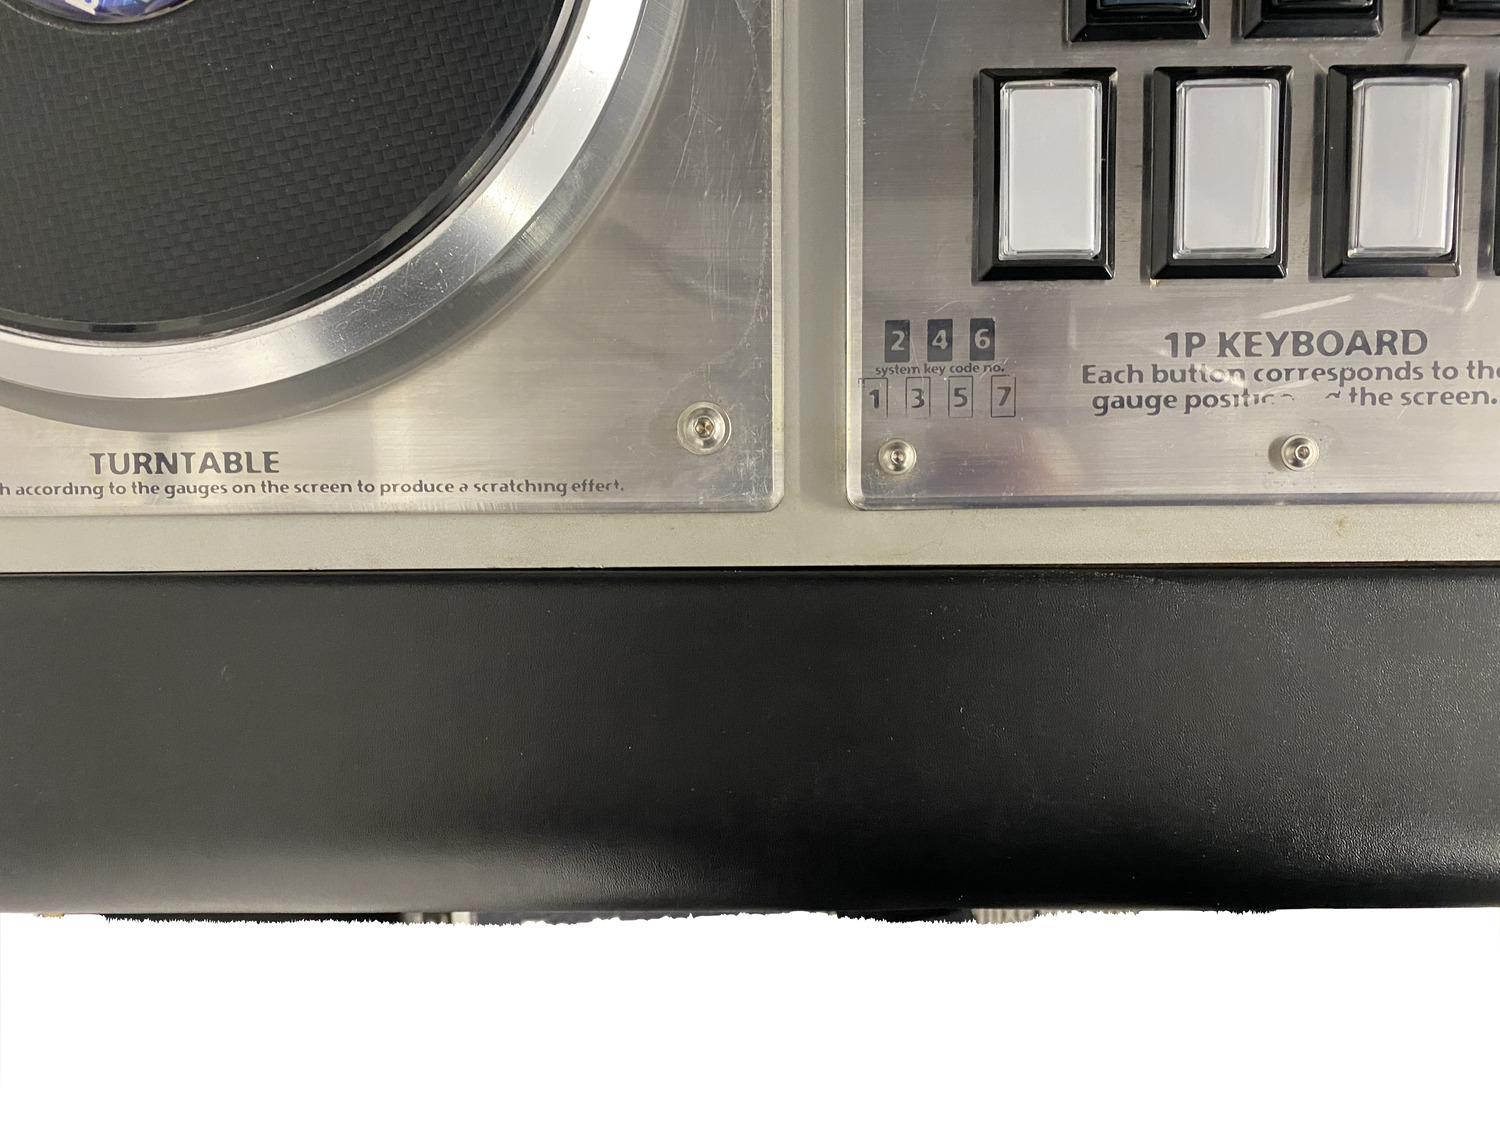
- Both 7 key panels: (8)
- Coin slot panel: (7)
- Turn table panels: (10) + (9)
- Chrome side covers: (3) and (4)
- Remove 6x nuts from the inside to remove armrest (2)
Depending on how broken the armrest is, it might already come off like that because the the wooden slat holding is broken.
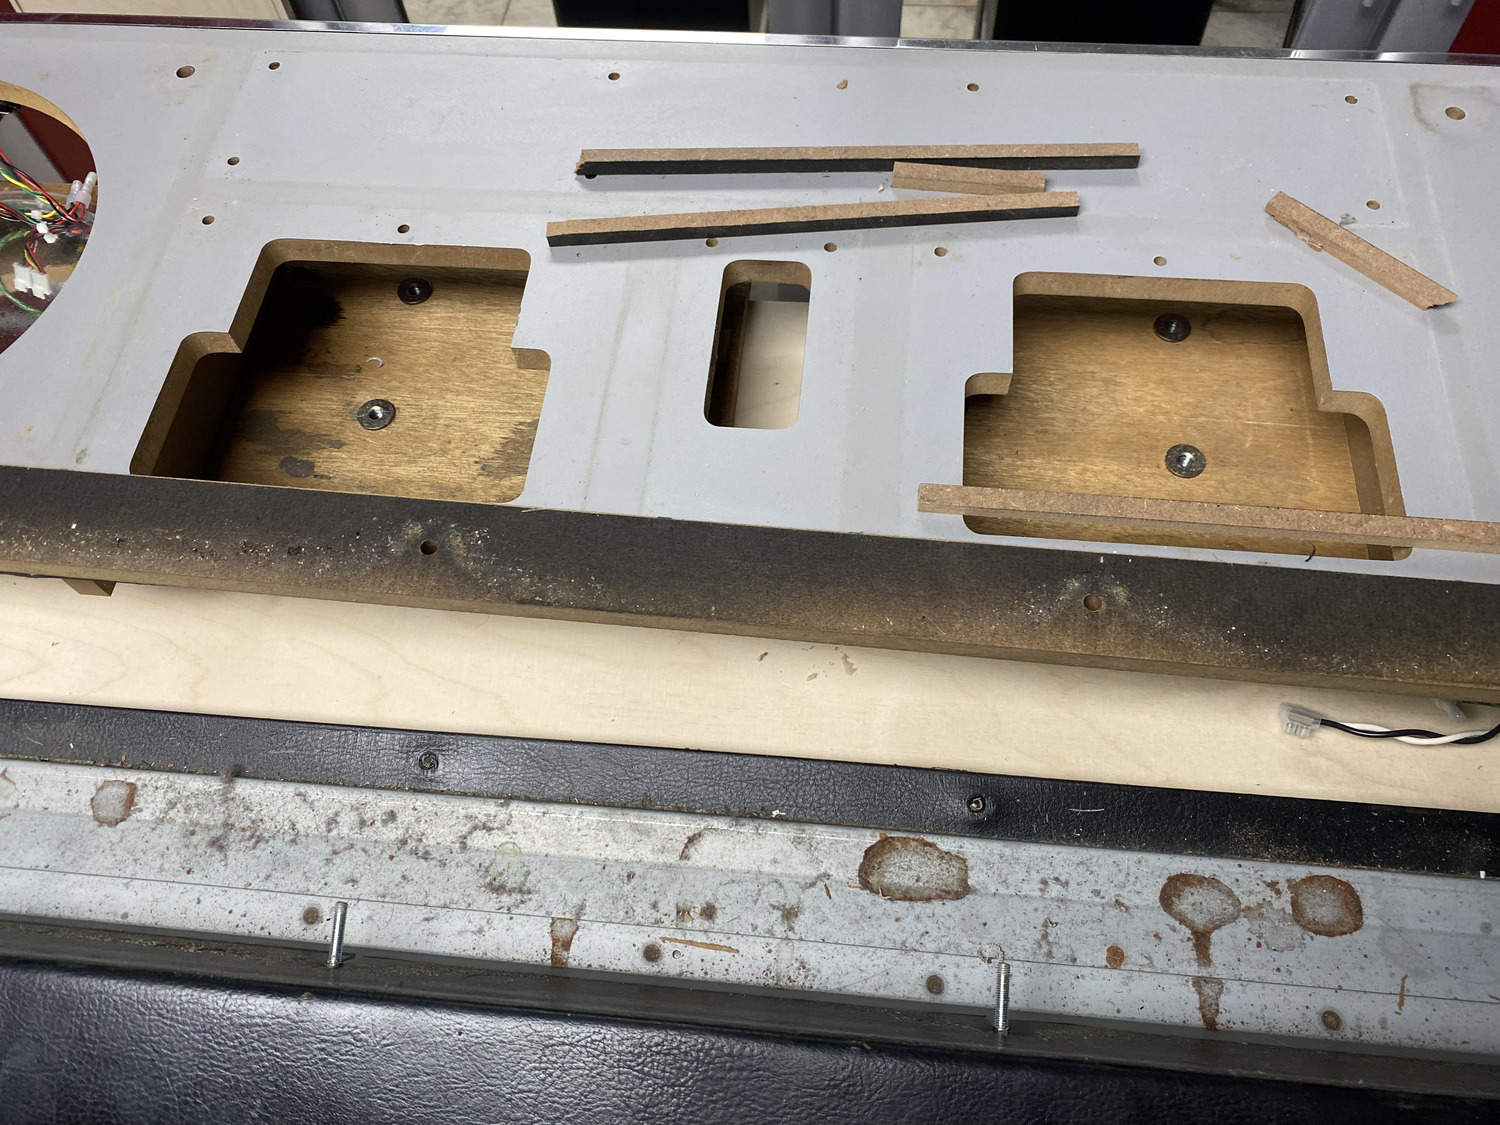
The damage
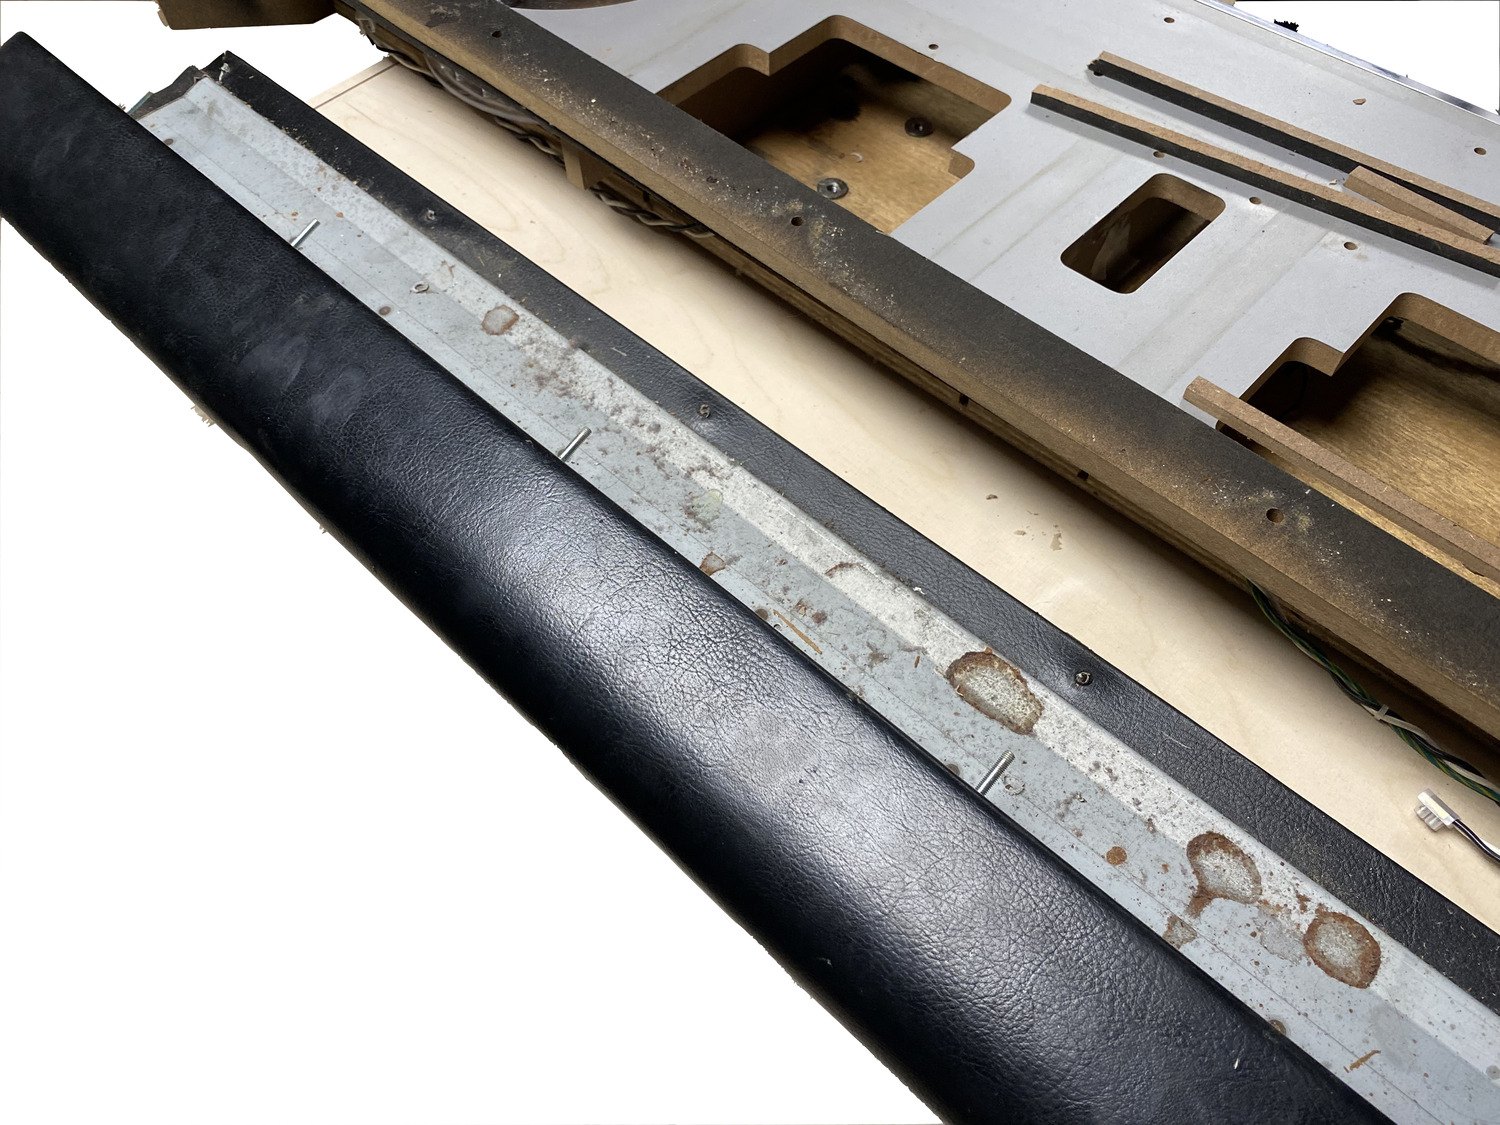
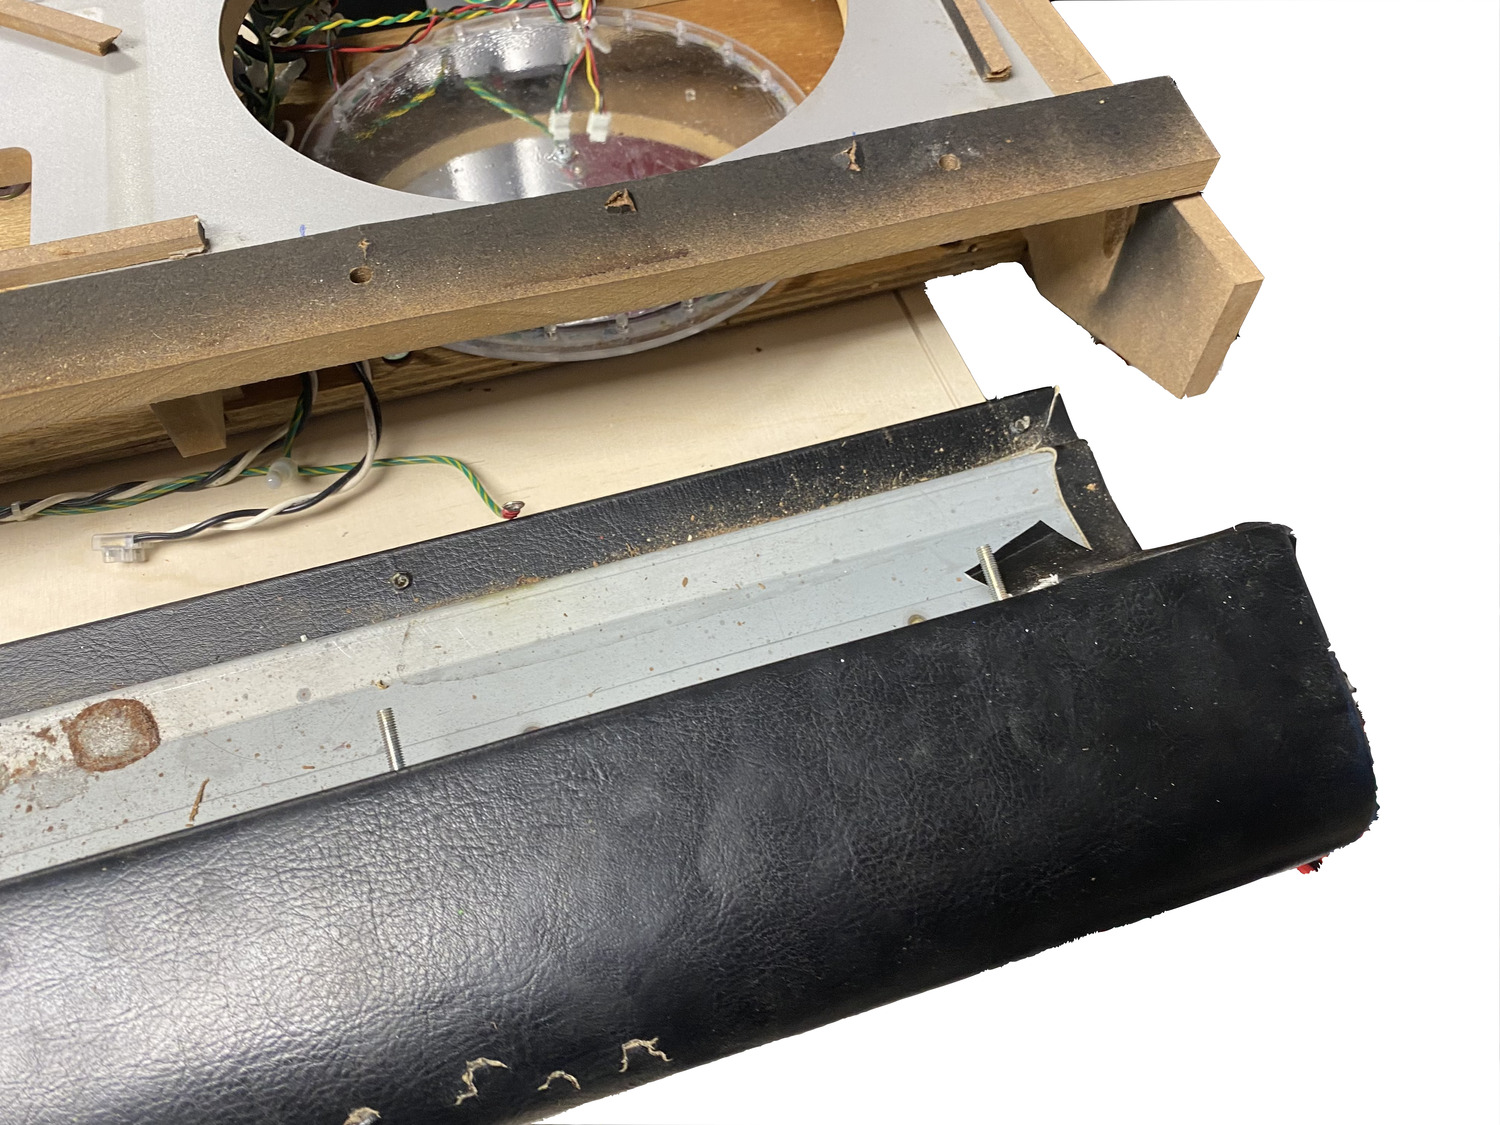
Mine looked like this with the lose wooden slat put on top of the deck:
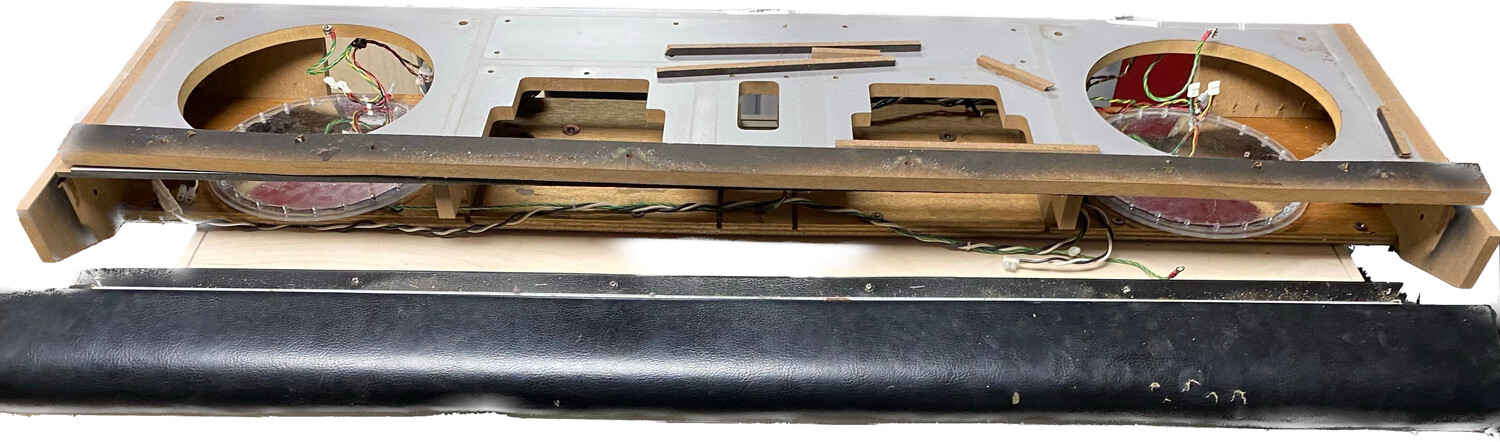
Close-ups of what was supposed to hold the armrest, and of the damaged old/stock leather on the armrest:
Re-attaching the armrest wood slat
- Check if there are any old glue remains and remove them with the box cutter or a flat head screw driver
- Apply wood glue to the deck where the lose wood slat goes and to the slat itself
- Put it back and ensure it faces the right way around or the holes for the armrest might not fit later
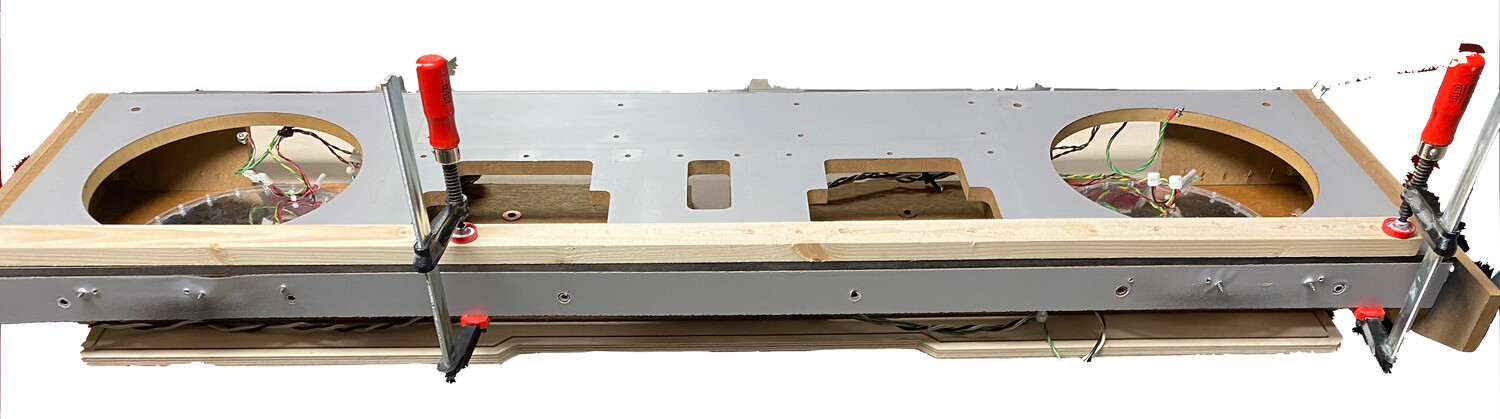
- Put a long wood slat on the deck and use wood clamps to carefully apply pressure until the wood glue gets squeezed out from the cracks (see picture below)
- You might want to use a few more wood clamps than shown on the picture to ensure pressure is applied evenly along the entire length of the deck
- Wipe away the excessive glue with a light wet towel
- Let everything sit and dry as stated on the wood glue instructions
Additional re-enforcement
I forgot to take proper pictures of that part. I hope the following annotated picture will do the job and supports my explanations below:
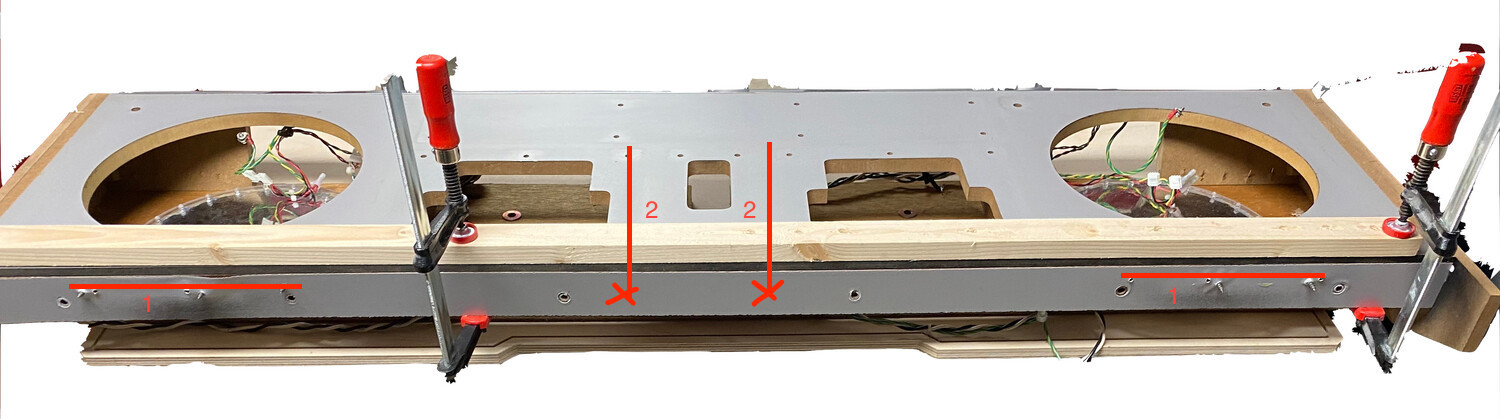
The armrest wood slat is not well supported by default and might break off again easily. I cut a few short wood slats, ~10 cm, and screwed them inside the deck below the coin panel (2). Another screw goes through the wood slat for the armrest into the supporting slat (X on 2). The previous owner already supported with additional slats at the turn tables (1). I improved that solution by using better (and shorter) screws. The slats are held by screws that are visible from the top of the deck but are hidden by the turn table panel when everything is fully assembled.
Removing the old leather from the armrest
I haven’t taken pictures of the work in progress of this. With the armrest off, it becomes visible that the stock fabric is just glued to some foam that is glued to the metal armrest. Slowly and carefully remove the leather by pealing it off starting on one edge. The older the glue, the easier it might come off but be prepared for some nasty stickiness from the old glue.
Once the old leather is off, I used an old but clean piece of cloth and some isopropyl to remove further glue remains from the metal and carefully wiped the foam as well. The surface needs to be fairly clean and smooth so the new leather does stick properly.
Applying the new leather
Cut the new leather in length but leave some excess/buffer. Be aware that some of the leather must fold over to the inside to create a clean finish. Do not cut it to the exact length and width of the armrest. You can always remove excessive material at the end with a sharp box cutter.
It might be a good idea to get a helping hand for this. The tricky part is to apply the leather cleanly and avoid wrinkles and (air) bubbles.
Put the new leather on the table so the covering foil that covers the glue faces up. Remove part of the foil, about 5-10 cm width, on the full length. Take the armrest and slowly put it on the leather with the bottom edge and roll it apply the first 5-10 cm of leather to it. Turn around the armrest and check for wrinkles. Carefully remove the leather a bit again and smooth out wrinkles and bumps with your hand.
Ensure to have some of the leather go beyond the armrest. Folding that over to the inside is done at the very end.
Continue peeling off the covering foil from the armrest continuously, keep applying the leather to the armrest and keep smoothing out bumps and wrinkles.
Once you went around the entire armrest, you should have at least 2-3 cm more leather going beyond the armrest’s edges. Fold it over to the inside. At corners and at the rounding part, you need to carefully introduce cuts to create clean overlaps (see the picture above of the old armrest).
Putting everything back together
Re-assemble in reverse order. Final pictures:
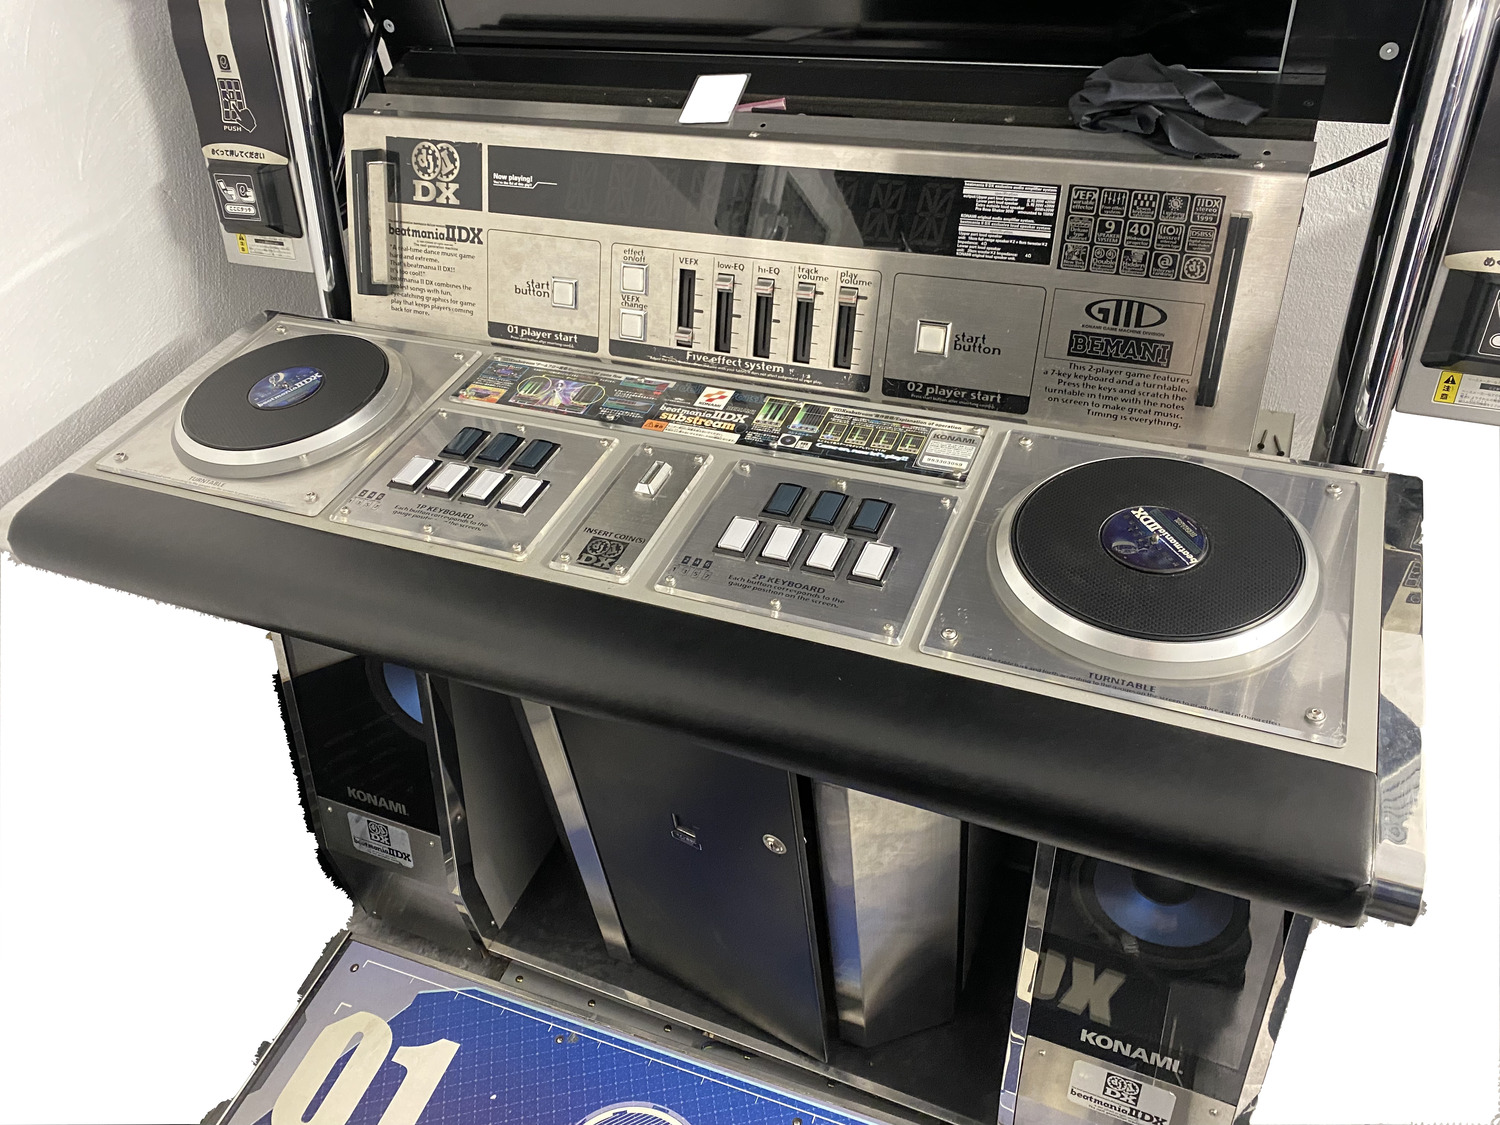
No gap between the armrest and the deck anymore \o/